Want to grow potatoes at home in an easy, space-saving way? Using styrofoam boxes as raised garden beds, you can harvest a bountiful crop of potatoes in just 3 months, as shown in a popular gardening method. This technique is perfect for small backyards, urban gardens, or even patios, requiring minimal setup and maintenance. In this guide, we’ll walk you through the step-by-step process of potato gardening using styrofoam boxes, from planting to harvesting, so you can enjoy fresh, homegrown potatoes with your family.
Why Grow Potatoes at Home in Styrofoam Boxes?
Benefits of Using Styrofoam Boxes
Styrofoam boxes are an excellent choice for growing potatoes in styrofoam boxes because they’re lightweight, affordable, and provide good insulation for the soil. They retain moisture well, protect the roots from temperature fluctuations, and make harvesting a breeze—no digging required! Plus, they’re reusable and can be sourced for free from local stores or markets (think fish or vegetable boxes). This method also keeps your garden neat and prevents soil from spilling, making it ideal for small spaces.
Why Potatoes Are Perfect for Home Gardening
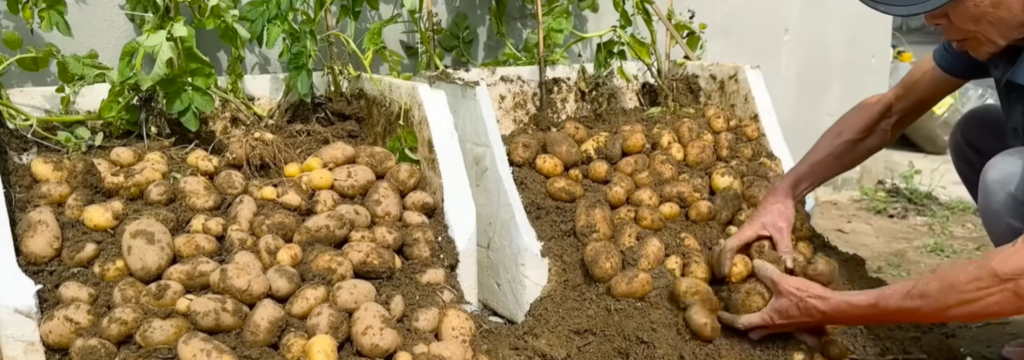
Potatoes are one of the easiest crops to grow at home. They’re hardy, require minimal care, and yield a high return—each plant can produce 5-10 potatoes. With the right setup, you can harvest a full box of potatoes in just 3 months, as shown in the image of a gardener collecting dozens of potatoes from a single styrofoam box. Whether you’re a beginner or a seasoned gardener, potato gardening in raised garden beds like styrofoam boxes is a rewarding project.
Step-by-Step Guide to Grow Potatoes at Home
Step 1: Gather Your Materials
To start growing potatoes in styrofoam boxes, you’ll need:
- Styrofoam boxes: Choose boxes at least 12-18 inches deep with drainage holes (poke a few holes in the bottom if needed).
- Seed potatoes: Use certified seed potatoes (available at garden centers) or organic potatoes that have sprouted eyes. Cut them into pieces with 1-2 eyes each and let them dry for a day.
- Soil mix: A mix of garden soil, compost, and sand (2:1:1 ratio) for good drainage and nutrients.
- Fertilizer: Organic compost or a balanced fertilizer (10-10-10).
- Watering can and a sunny spot in your backyard (6-8 hours of sunlight daily).
Step 2: Prepare the Styrofoam Boxes
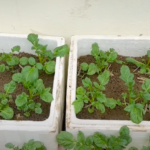
Place your styrofoam boxes in a sunny location. Fill each box with 4-6 inches of the soil mix. Place the seed potato pieces on top, spacing them 8-10 inches apart, with the eyes facing up. Cover with 2-3 inches of soil. Water gently to moisten the soil without soaking it. As the potato plants grow, you’ll add more soil—a process called “hilling”—to encourage more tuber growth.
Step 3: Care for Your Potato Plants
Water the plants regularly to keep the soil moist but not waterlogged—about 1-2 inches of water per week. As the potato plants grow to 6-8 inches tall, add more soil mix to cover the stems, leaving just the top leaves exposed. Repeat this hilling process every 2-3 weeks. Fertilize every 4 weeks with compost or a balanced fertilizer to support healthy growth. Watch for pests like potato beetles and remove them by hand if spotted.
Harvesting Your Potatoes in 3 Months
When to Harvest
After about 3 months (or when the plants’ leaves start to yellow and die back), your potatoes are ready to harvest. This timing aligns with the image of a gardener collecting a large yield from styrofoam boxes after 3 months. To check, gently dig around one plant—if the potatoes are 2-3 inches in diameter, they’re ready.
How to Harvest
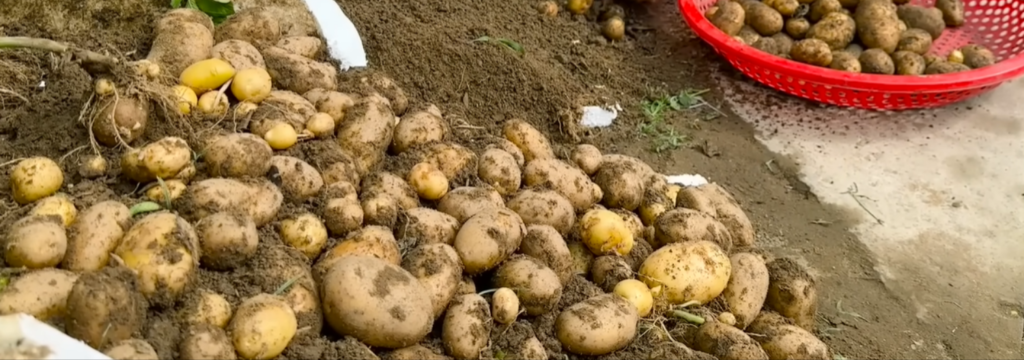
Harvesting from styrofoam boxes is simple. Tip the box onto a tarp or flat surface to release the soil and potatoes, as shown in the image where dozens of potatoes spill out. Collect the potatoes in a basket (like the red perforated basket in the photo) and brush off excess soil. Store them in a cool, dark place for up to a month.
Tips for Success in Potato Gardening
Maximize Your Yield
To get the best results when you grow potatoes at home, choose a potato variety suited for your climate (e.g., Yukon Gold or Red Pontiac). Rotate crops each year to prevent soil depletion, even in styrofoam boxes. If you notice small, green potatoes, cover them with soil immediately—exposure to sunlight makes them toxic.
Reuse and Expand Your Setup
After harvesting, clean your styrofoam boxes and store them for the next season. You can expand your raised garden beds by adding more boxes to grow other crops like carrots or onions alongside your potatoes, creating a diverse backyard garden.
Conclusion: Start Growing Potatoes at Home Today
Using styrofoam boxes to grow potatoes at home is an easy, efficient way to enjoy fresh produce in just 3 months. With minimal setup and care, you can harvest a bountiful crop right from your backyard, just like the gardener in the image. Ready to start your potato gardening journey? Grab some styrofoam boxes and seed potatoes, and share your progress in the comments below!